
Month 3: The Shelter Mastery Challenge
When disaster strikes, the security of a solid shelter is one of the most immediate and critical needs for survival. A reliable shelter protects you from harsh weather, shields you from predators or threats, and offers a psychological anchor during chaos.
Yet, many people assume their homes will always provide this protection. In reality, homes are just as vulnerable as those living in them. Floods, earthquakes, tornadoes, and hurricanes can render houses uninhabitable in moments.
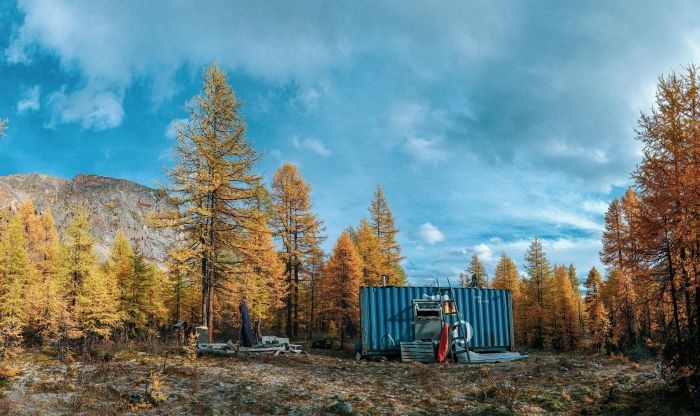
We have an old semi-truck body for a shelter of sorts. It’s very sturdy and surrounded by trees. It was here when we purchased this property. Many people living in the country here have a “semi” in their backyard. It needs work—a new floor and a fixed pull-down door—but we are working on it!
Even less dramatic events, like a sustained power outage in extreme temperatures, can make staying at home life-threatening. For those forced to leave their homes during emergencies, the problem becomes even more complex.
Bugging out introduces many new challenges, from finding a safe location to constructing a reliable shelter on the fly. Outdoor conditions can be unpredictable and unforgiving.
Exposure to wind, rain, or snow without adequate protection can quickly lead to hypothermia or dehydration. Heat waves bring their own dangers, such as heatstroke and dehydration, which can become lethal without shade or ventilation. Relying on luck or improvisation in such scenarios is risky and often deadly.

Long-term emergencies bring new shelter challenges even if your home remains structurally intact. Over time, minor issues like a broken window or a leaking roof can grow into significant problems.
Without access to professional help, these repairs fall squarely on your shoulders. A damaged roof can let in water, weakening your home’s structure and encouraging mold growth.
A broken window exposes you to the elements and compromises your security. In long-term situations, homes require constant upkeep to remain livable, especially when repair supplies and services are no longer available.
Nature doesn’t wait for you to prepare. Weather patterns can shift suddenly, turning an otherwise manageable event into a survival crisis. A poorly prepared shelter means exposure, and exposure means danger.
Families with young children, elderly members, or anyone with medical conditions are especially vulnerable to inadequate shelter. Moreover, knowing how to repair damage after the fact isn’t enough.
Emergencies demand immediate action to secure your living space or construct a temporary one, often with limited tools and resources. Shelter is the backbone of survival, but it doesn’t have to be your Achilles’ heel.
Preparation is the key to security, whether protecting your home or constructing an outdoor shelter. Mastering the ability to build and repair shelters in any weather gives you the confidence to face unexpected challenges. You ensure that your home remains a sanctuary and that, should you need to leave it, you can construct a safe haven wherever you go.
Mastering Bug Out Shelters and Home Repairs for Survival
The ability to create and maintain shelter is critical for both bugging out and staying home during emergencies. When you’re on the move, constructing a reliable bug out shelter with minimal tools and materials can protect you from the elements, wild animals, and other threats.
Knowing how to perform basic home repairs is just as important when you’re staying in place. In a long-term crisis, you won’t have the luxury of calling a contractor to fix a leaking roof or a broken window. Mastering these skills ensures you’re prepared to protect yourself and your family in any situation.
Building Bug Out Shelters
Bug-out shelters come in many forms, but they all share the goal of providing immediate protection with limited resources. The most straightforward and most versatile option is a tarp shelter.
Tarps are lightweight, durable, and highly adaptable. To build a basic A-frame tarp shelter, you’ll need a tarp, some cordage (like paracord), and two anchor points, such as trees.

Stretch the tarp between the anchor points, tying it securely at both ends and stake down the sides to create a tent-like structure. This setup is quick, effective, and protects against wind and rain.
For more extreme conditions, consider a debris shelter. This type of shelter is constructed entirely from natural materials like branches, leaves, and dirt. Start by finding a sturdy, fallen branch or a large stick to serve as the ridgepole.
Prop one end of the ridgepole on a tree stump or similar support and lay smaller branches against it at an angle to create a frame. Cover the frame with layers of leaves, grass, or pine needles to make insulation and waterproofing.

Add a thick layer of debris to the floor to keep yourself off the cold ground. While labor-intensive, a debris shelter is highly effective for long-term use in the wilderness.
Pop-up survival tents are another excellent option for bug-out shelters. These pre-fabricated tents are compact, easy to carry, and can be set up in minutes. Look for models made from weatherproof materials with built-in ground sheets to protect against moisture.
【Easy Setup】Instant pop-up tent with pre-assembled poles sets up in seconds; open the bag and let go. Even if it rains suddenly, you don’t have to be flustered.
【Enjoy the Breeze】Mesh front & back doors provide enough airflow. It can be closed with just the screen material or sealed with the nylon door for total privacy. You do not have to go outside to close the windows when raining.

While they may not offer the same versatility as a tarp or natural shelter, survival tents are ideal for situations where speed and portability are priorities. If you’re bugging out in an urban environment, you may need to improvise with available materials.
Abandoned buildings, culverts, or large cardboard boxes can serve as temporary shelters. To improve their durability, reinforce these structures with tarps, duct tape, or additional insulation. Keep in mind that urban shelters may draw unwanted attention, so prioritize hidden or inconspicuous locations.
Basic Home Repairs for Survival Situations
While bug-out shelters are essential for those on the move, staying home during a crisis comes with its own challenges. Over time, your home may sustain damage from severe weather, neglect, or attempts at forced entry. You’ll need to handle these issues without access to contractors or repair services.
Start by familiarizing yourself with standard tools and materials for home repair. An essential toolkit should include a hammer, screwdrivers, a handsaw, pliers, a utility knife, duct tape, a tape measure, and a cordless drill.
Add materials like plywood, nails, screws, heavy-duty plastic sheeting, and weatherproof sealants to your supply. These items will allow you to address most small-to-medium repairs.
One of the most common post-disaster repairs is fixing a broken window. A shattered window not only leaves your home exposed to the elements but also compromises security.
Start by carefully removing all broken glass and cleaning the frame. Cover the opening with heavy-duty plastic sheeting or plywood if replacement glass isn’t available. Secure the material to the frame using nails or screws, ensuring it’s taut and weather-resistant. For added security, consider reinforcing the patch with a cross-brace made from scrap wood.
Roof leaks are another issue that can escalate quickly if not addressed. Identify the source of the leak by inspecting your attic or ceiling for water stains. Once located, use a tarp to cover the damaged area as a temporary fix.
Secure the tarp with nails or heavy rocks to prevent it from blowing away—patch holes or cracks with roofing cement and reinforcing fabric for a more permanent repair. If shingles are missing, replace them as soon as possible using spare shingles or improvised materials like flattened aluminum cans.
Doors and locks are critical for home security. In a long-term emergency, damaged doors or weakened locks can make your home an easy target. Reinforce doors by installing longer screws in the hinges and strike plates, which make it harder to kick in. If the door itself is damaged, use plywood or metal sheets to strengthen it from the inside. For additional security, consider installing a bar or brace behind the door.
Walls can also suffer damage, especially during natural disasters. Cracks in drywall or plaster may not seem urgent, but they can compromise insulation and structural integrity over time.
Patch small cracks with spackle or joint compound and sand them smooth. For larger holes, cut a piece of drywall to fit the opening, secure it with screws, and cover the seams with joint tape and compound. Paint over the repair for added durability and weatherproofing.
Preparing for Shelter Challenges
Preparation is key to successful shelter management. To improve your speed and confidence, practice building bug-out shelters in different environments and weather conditions.
Familiarize yourself with the tools and materials needed for home repairs and organize them in a dedicated kit. Finally, inspect your home regularly for signs of wear or damage so you can address small problems before they become major issues.
Mastering shelter skills ensures you’re ready to adapt to any situation, whether constructing a safe haven in the wilderness or keeping your home secure during a crisis. By practicing these techniques now, you’ll gain the knowledge and confidence to protect yourself and your loved ones when it matters most.
Practice Creating Wind-Resistant and Waterproof Shelters
A shelter’s ability to withstand wind and water is crucial to survival in adverse conditions. Wind can strip away improvised coverings, collapse poorly anchored structures, or expose you to freezing temperatures.
Rain, sleet, or snow can penetrate weak shelters, soaking you and your supplies and leading to hypothermia and water damage. Learning how to construct shelters that can resist these elements is a fundamental survival skill.
Creating Wind-Resistant Shelters
To make a shelter wind-resistant, start with proper site selection. Avoid open, exposed areas like hilltops or plains, as these bear the brunt of strong winds. Instead, look for natural windbreaks such as boulders, dense vegetation, or hillsides.
When choosing your spot, consider the prevailing wind direction and position your shelter so that its most stable side faces the wind.
Anchoring is the foundation of wind resistance. For tarp shelters, use heavy-duty stakes to secure the tarp tightly to the ground. If the soil is loose or sandy, reinforce the stakes by tying them to heavy rocks or buried logs.
Keep the tarp’s profile as low to the ground as possible to reduce wind drag. The A-frame design is particularly effective, as its sloped sides deflect wind rather than catching it.
Sturdy branches create a strong frame when building with natural materials. Anchor the structure’s base with rocks or lash it to stable objects like trees or large roots.
Use overlapping layers of branches and debris to reduce gaps and increase the shelter’s stability. Cordage can be used to tie the frame to nearby trees or other immovable objects for additional security in areas with strong winds.
Proper setup can also make improvised shelters like pop-up survival tents wind-resistant. Secure the corners and guy lines tightly, and use natural barriers to shield the tent from direct gusts. Adding additional weight, such as rocks around the base, can help stabilize lightweight materials.
Ensuring Waterproof Protection
A wind-resistant shelter is only effective if it also keeps you dry. Waterproofing begins with your shelter material. Tarps, Mylar blankets, and plastic sheeting are excellent for creating a waterproof barrier.
When using a tarp, angle it steeply to encourage water runoff and prevent pooling. Taut lines are essential—sagging creates pockets where water can collect, increasing the risk of leaks or collapse.
For natural shelters, use layers to create a watertight seal. Start with a solid base of branches, then add a thick covering of leaves, grass, or pine needles. The more compact and layered the debris, the better it repels water.
Add an outer layer of bark or large leaves, like banana or palm leaves, for additional protection. Test your work by pouring water over the structure before settling in. If leaks occur, identify and patch weak points with extra materials.
The ground beneath your shelter is another key consideration. Water flows downhill, so choose a site that is slightly elevated or has natural drainage. If the ground is damp or prone to flooding, lay down a barrier of sticks, leaves, or tarp to keep moisture from seeping through. Dig small trenches around your shelter to divert rainwater away in extreme conditions.
Combining Wind and Water Protection
Wind and water often occur together, especially during storms, so your shelter must be able to handle both simultaneously. Double-check that all materials are tightly secured and that no loose ends are flapping in the wind, as these can tear or unravel over time. Reinforce weak points with extra cordage or overlapping layers of material.
If you use a tarp, adjust the height to balance wind resistance and waterproofing. A lower setup deflects wind better but may compromise airflow, leading to condensation. For natural shelters, prioritize strong structural support, as wet debris can become heavy and collapse under its own weight.
Preparing for Extreme Conditions
Even the best-designed shelter may face challenges in extreme weather. Having contingency plans can make all the difference. Keep additional materials on hand, such as extra tarps, duct tape, or cordage, to repair damage on the spot. If time allows, build a secondary layer of protection, such as a windbreak or an additional roof layer.
Practicing these skills in a variety of conditions is essential. Set up shelters during different weather scenarios—calm, windy, rainy, and snowy—to understand how materials and designs perform. Experiment with different setups and techniques to identify what works best in your environment.
By mastering wind-resistant and waterproof shelter construction, you can stay protected in even the harshest conditions. This skill keeps you safe and dry and provides a critical morale boost, allowing you to rest and recover with confidence no matter what nature throws your way.
Gathering Emergency Shelter and Home Repair Materials
Preparing for shelter means having the right materials before disaster strikes. When emergencies hit, supplies quickly become scarce, and you may not have the opportunity to gather what you need.
By stockpiling emergency shelter materials and home repair items now, you ensure you’ll be ready to adapt to any situation, whether staying home or bugging out. Start with materials designed for immediate shelter needs.
Mylar blankets are a survival essential. They are compact, lightweight, and highly effective at retaining body heat. Use them as a base layer inside your shelter to reduce heat loss, or drape them over the outside for added waterproofing.
Extra-Large Thermal Mylar Space Blankets with Ripstop Nylon Stuff Sacks + Carabiner Zipper Pack
Massive 7x5 foot emergency blankets are 23% larger than standard foil blankets for full body protection. With some tape and paracord, these XL mylar heat sheets can be converted into an emergency shelter, sleeping bag, emergency bivy, or other survival gear.
![Don't Die In The Woods - Freakin' Huge Emergency Blankets [4-Pack]](https://m.media-amazon.com/images/I/5121L2UTzbL._SL500_.jpg)
Tarps are another must-have. Their versatility makes them invaluable for building temporary shelters, reinforcing existing ones, or protecting supplies from rain and wind. Choose heavy-duty tarps with reinforced edges and grommets for durability and ease of use.
Sleeping bags are critical for warmth and comfort, particularly in cold climates. Even if you live in a mild region, opt for sleeping bags rated for temperatures below freezing. Unexpected weather changes can make the difference between comfort and hypothermia.
Synthetic insulation is better for wet conditions, retaining heat even when damp. Compact bivy sacks are also excellent additions to your kit. They are lightweight and waterproof and can be used alone or as an extra layer around a sleeping bag.
Cordage is another essential material. Paracord is the gold standard due to its strength, flexibility, and wide range of uses. Use it to secure shelters, repair gear, or create makeshift tools.
Stock at least 100 feet, and consider smaller rolls for easy portability. Duct tape is equally versatile. It can patch holes, reinforce materials, or even create makeshift tools. Include multiple rolls in your supplies, as it’s easy to underestimate how quickly you’ll use them.
Stockpiling the right tools and materials is vital when it comes to home repair. Heavy-duty plastic sheeting is invaluable for covering broken windows, patching leaks, or even creating barriers to block drafts.
Keep plywood on hand for reinforcing doors, windows, or structural weaknesses. Pre-cut sheets are easier to manage during emergencies, but larger boards can be cut to size as needed.
Fasteners like nails, screws, and bolts are the backbone of home repairs. Organize them by size and type in a portable container for quick access. A basic toolkit should include:
- a hammer,
- cordless drill,
- utility knife,
- screwdrivers,
- pliers,
- and a saw.
These tools handle most repairs, from sealing cracks to reinforcing structural elements.
Roofing repair materials, such as tar or asphalt patches, are also essential. If shingles are damaged or missing, these materials provide a temporary fix to keep water out.
Metal flashing is useful for sealing gaps around chimneys, vents, or other protrusions. A caulking gun with weatherproof sealant is another versatile tool for filling cracks and preventing water intrusion.
For long-term emergencies, consider materials for more extensive repairs. Spare lumber, metal brackets, and reinforcing straps allow you to handle significant structural damage.
Keep a supply of sandbags for controlling flooding or stabilizing makeshift shelters. If space allows, stock portable power tools and a small generator for heavier repairs.
Organizing and storing these materials is as important as having them.
Create a designated space for emergency shelter and repair supplies in your home or garage. Use labeled bins to keep items grouped by purpose, such as:
- “shelter building,”
- “roof repair,”
- or “general tools.”
Ensure everything is easily accessible, as you may need to act quickly during an emergency.
Regularly inspect and update your inventory.
- Check tarps and plastic sheeting for wear,
- test tools to ensure they’re functional,
- and replace any missing or used items.
Having a complete, well-maintained supply ensures you’re prepared to handle any situation, no matter how unexpected.
By gathering these materials now, you create a foundation for resilience. Whether you’re repairing a roof, building a bug-out shelter, or weathering a storm at home, you’ll have the resources to face the challenge head-on. Planning ahead minimizes stress and maximizes your ability to protect yourself and your family during a crisis.
Shelter is one of the most critical aspects of survival but also one of the most overlooked. Emergencies demand quick action and resourcefulness, whether you’re building a bug-out shelter in the wilderness, repairing storm damage to your home, or preparing for long-term self-reliance. With the right knowledge, materials, and practice, you can ensure your safety and comfort no matter the situation.
Mastering shelter-building skills, practicing weather-resistant designs, and stockpiling essential tools and materials are all steps toward true preparedness. These efforts provide more than just physical protection—they offer peace of mind, knowing you’re ready to face any challenge.
Shelter is more than a structure. It’s your security, sanctuary, and first line of defense. By preparing now, you take control of your safety and protect what matters most.