Month 3: The Shelter Mastery Challenge

This post may contain affiliate links. If you buy through them, I may earn a small commission at no extra cost to you.
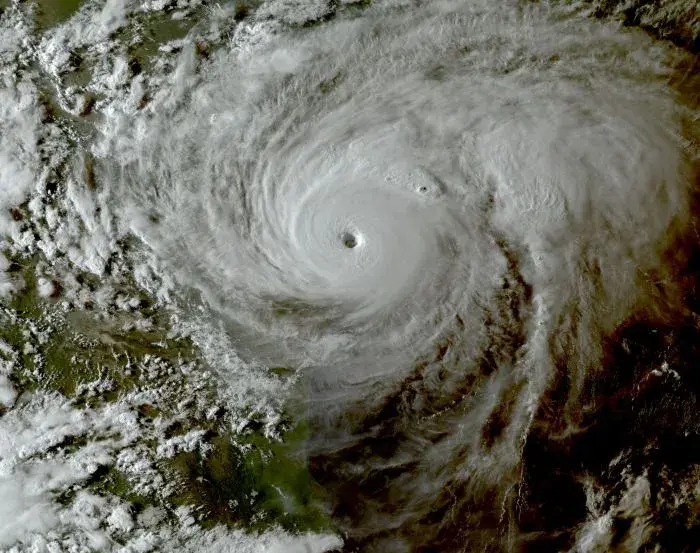
Shelter is your first line of defense. When it fails, everything else becomes harder. Heat, cold, wind, and exposure can turn a manageable situation into a survival emergency very quickly.
30-Day Shelter Mastery Plan You Can Follow Step-by-Step
Most people assume their home will always protect them. That’s a mistake.
This is Month 3 of the 12 Months of Survival Prepper Challenges. Your goal is to build a shelter system that works whether you stay home or are forced to leave.
As you work through this month, remember that shelter is more than a structure. It protects you from weather, adds security, and gives you a place to recover. When homes are damaged or you must evacuate, your ability to adapt becomes critical.
This 30-day plan will guide you step by step to build real shelter resilience with confidence.
30-Day Shelter Mastery Challenge
Each week builds on the last.
Follow it step by step.
Week 1: Strengthen Your Home
Goal: Make your home safer and more secure.
Day 1
Inspect your home for weak points
Day 2
Check doors and locks
Day 3
Inspect windows and seals
Day 4
Identify roof or leak issues
Day 5
Gather basic repair tools
Day 6
Secure one weak area
Day 7
Review and note improvements
Week 2: Learn Basic Repair
Goal: Fix problems without outside help.
Day 8
Learn how to patch a broken window
Day 9
Practice sealing gaps and cracks
Day 10
Learn temporary roof repair
Day 11
Reinforce a door or entry point
Day 12
Organize repair materials
Day 13
Practice one repair skill
Day 14
Review your setup
Week 3: Build Simple Shelters
Goal: You can create shelter anywhere.
Day 15
Learn tarp shelter basics
Day 16
Practice setting up a tarp shelter
Day 17
Learn debris shelter basics
Day 18
Build a simple test shelter
Day 19
Test it in wind or rain if possible
Day 20
Improve your setup
Day 21
Practice again
Week 4: Prepare for Real Conditions
Goal: Handle weather and emergencies.
Day 22
Identify safe shelter locations
Day 23
Learn wind protection techniques
Day 24
Learn waterproofing basics
Day 25
Practice quick shelter setup
Day 26
Identify weak points
Day 27
Fix one major issue
Day 28
Review your system
Day 29
Organize materials
Day 30
Final test and review

What Can Go Wrong Fast
Most people underestimate shelter risks.
Homes can be damaged quickly. Weather exposure becomes dangerous fast. Repairs may not be possible. Evacuation may be required.
Exposure can become life-threatening faster than most expect.
When disasters damage homes or force evacuation, shelter becomes critical. Learn how to prepare in Evacuation Planning for Seniors.
Build a Simple Shelter System
Stop thinking “I have a house.”
Start thinking “I have options.”
Core Shelter Types
You need more than one option:
- reinforced home shelter
- tarp shelter for fast setup
- natural debris shelter
- emergency tent
Each type of shelter serves a different situation.
Tarps are one of the most useful shelter tools. They are lightweight, durable, and can be set up quickly using simple cordage and anchor points.
Natural debris shelters use branches, leaves, and ground cover to create insulation and protection. These take more effort but work well for longer outdoor situations.

Pop-up survival tents are useful when speed matters. They are easy to carry and can be set up quickly when conditions change.
【Easy Setup】Instant pop-up tent with pre-assembled poles sets up in seconds; open the bag and let go. Even if it rains suddenly, you don’t have to be flustered.
【Enjoy the Breeze】Mesh front & back doors provide enough airflow. It can be closed with just the screen material or sealed with the nylon door for total privacy. You do not have to go outside to close the windows when raining.

Basic Home Repairs That Matter
In a long-term emergency, your home will need maintenance.
Focus on:
- broken windows
- roof leaks
- weak doors and locks
- wall damage
A broken window exposes your home to weather and security risks. Cover it with plastic sheeting or plywood if needed.
Roof leaks should be patched quickly to prevent further damage. Temporary tarps can protect the area until repairs are made.
Doors should be reinforced to prevent forced entry. Small upgrades can make a big difference.
Fixing small problems early prevents larger failures later.
Shelter Materials You Should Have
Preparation starts with having the right materials:
- tarps
- paracord
- duct tape
- plastic sheeting
- plywood
- basic tools
Mylar blankets are also valuable. They help retain heat and can be used inside or outside a shelter for added protection.
Extra-Large Thermal Mylar Space Blankets with Ripstop Nylon Stuff Sacks + Carabiner Zipper Pack
Massive 7x5 foot emergency blankets are 23% larger than standard foil blankets for full body protection. With some tape and paracord, these XL mylar heat sheets can be converted into an emergency shelter, sleeping bag, emergency bivy, or other survival gear.
![Don't Die In The Woods - Freakin' Huge Emergency Blankets [4-Pack]](https://m.media-amazon.com/images/I/5121L2UTzbL._SL500_.jpg)
Wind and Weather Protection
Wind and water are your biggest threats.
- choose protected locations
- keep shelters low to the ground
- secure all materials tightly
- allow water to drain away
Layering materials improves insulation and waterproofing.
Test your setup before you need it. Small adjustments now can prevent major problems later.
Senior Considerations
Focus on:
- simple shelter designs
- lightweight materials
- easy-to-handle tools
- safe lifting limits
If it is too complicated or heavy, it will not work when you need it.
Quick Action Plan (Start Today)
- inspect your home
- fix one weak point
- get a tarp and cordage
- practice building a shelter
- create a basic repair kit
End of Month Check
- Can you secure your home?
- Can you build a shelter?
- Do you have materials ready?
- Can you handle bad weather?
If not, go back and improve weak areas.
This Challenge Is Part of Something Bigger
This is one step in the 12 Months of Survival Prepper Challenges, a complete system designed to help seniors build real preparedness one month at a time.
See All Monthly Challenges →FAQs
How important is shelter in survival?
It is critical. Exposure can become life-threatening quickly.
What is the easiest emergency shelter?
A tarp shelter is the fastest and most versatile.
What materials should I store?
Tarps, cordage, plastic sheeting, and basic tools.
Can seniors build shelters alone?
Yes, with simple methods and practice.
Next Step
Continue strengthening your preparedness by improving your water resilience and ensuring you always have access to safe drinking water.
Comment Section
Can you secure your home if something breaks? Do you have materials ready to build a shelter? What is your biggest weakness right now? Please share your experience below. Your knowledge and skills are helpful to others.