
Dehydrating and Canning When Standing Too Long Hurts
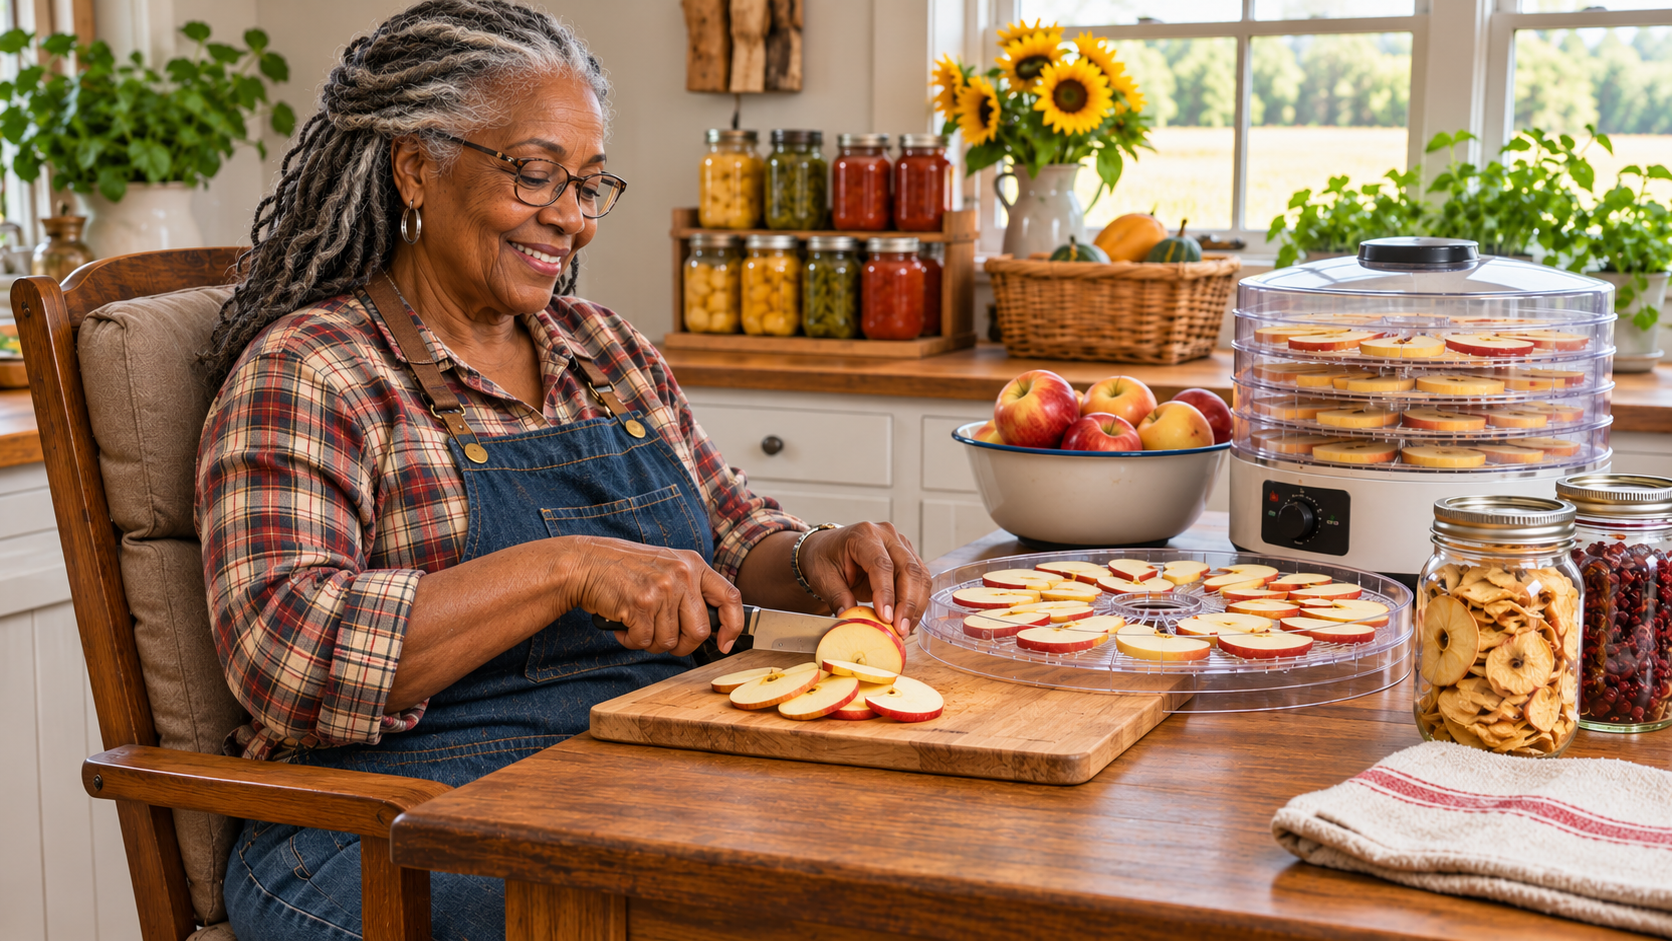

There’s something wonderfully satisfying about seeing shelves lined with homemade preserves or opening a jar of dried fruit you prepared yourself. But when your back, knees, or feet start complaining after just a short time standing at the kitchen counter, food preservation can become more exhausting than enjoyable.
The good news is that you don’t have to give up dehydrating or canning. With a comfortable workspace, smaller batches, and a little planning, you can keep putting food away without wearing yourself out in the process.
🌿 From My Homestead
Living on five rural acres has taught me that food security usually comes from small systems working together: growing some food, keeping a dependable pantry, preserving what you can, and planning ahead.
As I’ve gotten older, I’ve also learned to make self-reliance easier on the body. My goal with this series is to help you build more control over your food supply in practical ways that fit your space, budget, energy, and abilities.
The tips I share come from real experience, along with research and current homesteading best practices. My goal is simple: help you keep homesteading safely, comfortably, and for many years to come.
I’ve learned over the years that there is a big difference between being able to do something and being able to do it comfortably.
Between my back problems, knee injury, and several shoulder surgeries, I’ve had to change how I approach many everyday chores. Standing too long, reaching across a counter, or lifting something heavier than I should can turn a productive afternoon into several days of discomfort.
I still believe in growing and preserving our own food. But I’ve also learned that there’s no prize for finishing a job while hurting yourself.
Sometimes the smartest way to be self-reliant is to sit down, work in smaller batches, and give yourself permission to take a break.
Food preservation should help us prepare for the future, not leave us hurting today.
A Smarter Way to Preserve Food
You don’t have to spend an entire day on your feet to build a useful food supply. A seated preparation station, smaller batches, lighter equipment, and planned rest breaks can make home food preservation easier. The goal is to reduce physical strain without compromising food safety.
TL;DR for Seniors: Dehydrating and Canning without Standing Too Long
Food preservation doesn’t have to be a marathon kitchen project. By reorganizing your workspace and choosing tasks you can safely perform while seated, you can preserve homegrown or purchased produce with less pain and fatigue.
🌿 Key Points:
✅ Prepare and slice food while seated at a comfortable, stable worktable.
✅ Use smaller batches to reduce heavy lifting and long preparation sessions.
✅ Choose equipment with easy-to-read controls, comfortable handles, and manageable trays.
✅ Keep heavy canners in place on the stove instead of lifting them when full.
✅ Use tested canning recipes and approved equipment. Never shorten processing times to save energy.
✅ Plan breaks around natural work stages without interrupting required processing.
✅ Label and store finished food where you can reach it safely.
🌻 Takeaway: Work smarter, preserve safely, and let your food storage grow a little at a time.
Why Standing Too Long Makes Food Preservation Difficult
Food preservation involves more than putting produce into jars or arranging slices on dehydrator trays.
There’s washing, peeling, chopping, blanching, filling containers, cleaning equipment, and putting everything away.
Individually, those jobs may not sound particularly demanding. Together, they can become a problem for someone with physical limitations.
Standing at a kitchen counter places continued stress on your back, hips, knees, and feet. Reaching forward to chop vegetables can aggravate shoulder discomfort. Repeated gripping and twisting may bother arthritic hands.
Even the heat from a canner can make an already tiring job feel worse.
And here’s something worth remembering: fatigue increases the chance of making mistakes.
That matters especially when handling boiling water, hot jars, or a pressure canner.
The answer isn’t to rush through the job. It’s to redesign the job so you can do it comfortably and safely.
1. Create a Seated Food Preparation Station
One of the easiest improvements is to stop doing every preparation task while standing.
A kitchen table or properly adjusted work surface can become your food-preservation station.
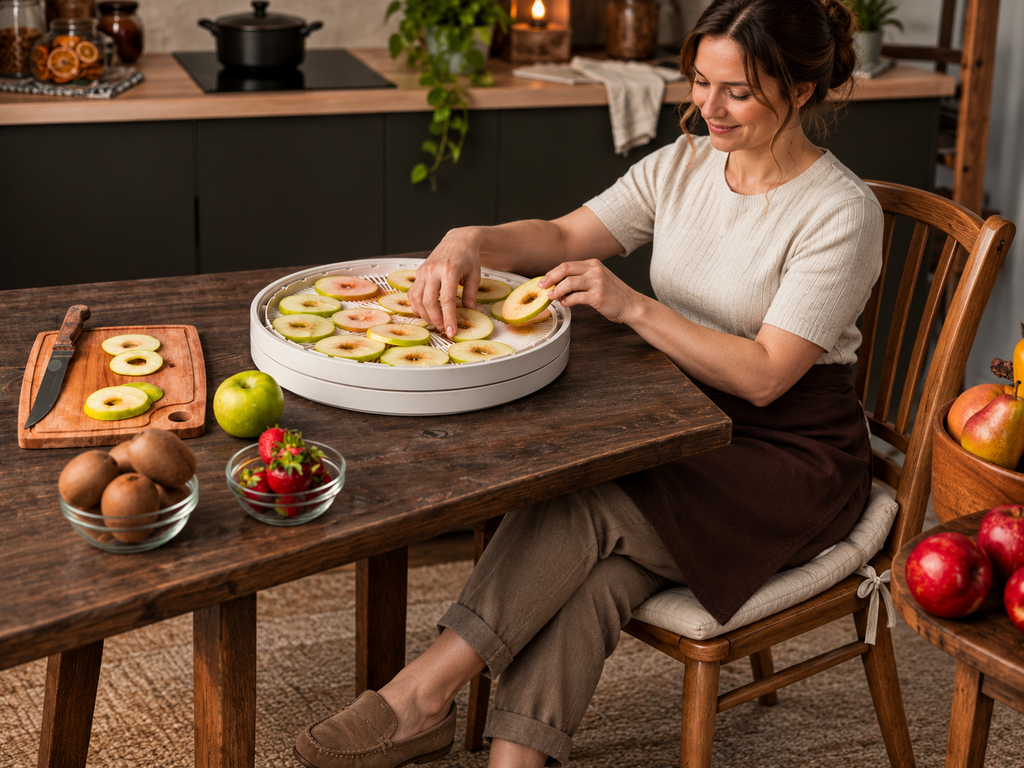
Choose a sturdy chair with good back support. Your feet should rest comfortably on the floor or on a stable footrest.
Keep your elbows close to your sides and position your cutting board so you aren’t constantly reaching forward.
If your shoulders or hands are sensitive, small adjustments in positioning can make a surprising difference.
Keep everything within easy reach
Before you begin, arrange your supplies.
- Place your cutting board directly in front of you.
- Keep a small bowl nearby for peels and scraps.
- Set washed produce within comfortable reaching distance.
- Use a nonslip mat under your cutting board.
- Keep knives, towels, and other tools close without crowding the workspace.
Avoid bending repeatedly to retrieve supplies from lower cabinets.
A rolling kitchen cart can also be useful for moving lightweight supplies between your worktable and counter.
Choose one with locking wheels so it stays securely in place when you’re working.
A word of caution: Don’t use a rolling cart to transport uncovered boiling water, hot jars, or heavy pressure canners.
A stable work surface and proper lifting technique are essential around hot equipment.
2. Dehydrating May Be the Easier Starting Point
If standing is your biggest problem, food dehydrating may be one of the most manageable preservation methods to learn.
Unlike canning, dehydrating usually doesn’t require maneuvering heavy pots of boiling water.
Once the food is prepared and properly loaded, a dehydrator can do much of the work.
You still need to follow drying instructions, check progress, and package the food correctly. But much of the preparation can happen while seated.
Foods that are practical for beginners
Some good foods to consider include:
- Apple slices
- Pear slices
- Banana slices
- Fresh herbs
- Sweet peppers
- Tomatoes
- Carrots and other vegetables prepared according to tested directions
Not every food is prepared the same way. Some need pretreatment to prevent browning. Many vegetables require blanching before drying.
Follow food-specific instructions from the National Center for Home Food Preservation rather than using one temperature and drying time for everything.
Choose a dehydrator that works for your body
Look for a model with:
- Lightweight, removable trays
- Easy-to-read digital controls
- An adjustable thermostat
- Accessible tray placement
- A timer or clear progress display
- Trays that are easy to clean
A front-loading model can be convenient because individual trays slide out without lifting an entire stack.
A stackable model may take up less space, but moving several trays can be awkward for someone with shoulder or hand problems.
Neither design is automatically better. Choose one that you can safely reach, open, and maintain.
Place the dehydrator on a sturdy, heat-safe surface with the ventilation clearance required by its manufacturer.
Avoid putting it on the floor or a high shelf where you must bend or reach to retrieve the trays.
3. Prepare Food in Smaller Batches
There’s no rule saying you must preserve every tomato, apple, or pepper in one afternoon.
Large batches can sound efficient. But they also create more chopping, washing, lifting, and cleanup.
For seniors with limited stamina, smaller batches can be more practical.
Instead of preparing an entire bushel of apples, start with a few pounds.
Wash and slice only what you can reasonably finish and load into the dehydrator.
That reduces the time produce spends sitting out and lowers the amount of work you need to complete at once.
A practical two-session dehydrating plan
Session 1: Preparation
Choose a manageable amount of fruit. Wash it, prepare your tools, and arrange your workstation. If you need a longer break, refrigerate perishable prepared food promptly.
Session 2: Drying
Slice or finish preparing the food, apply any required pretreatment, and load the trays. Start the dehydrator according to the food-specific instructions and monitor the drying process.
If you need to spread the work across two days, refrigerate prepared produce safely. Follow appropriate produce storage guidance and avoid leaving cut fruit or vegetables at room temperature for extended periods.
Remember that dehydrating often takes several hours. Do not confuse preparation time with total drying time.
The goal is to make the hands-on work manageable, not to rush the drying process.
4. Make Canning Easier without Compromising Safety
Canning presents different challenges because it involves hot equipment, heavy containers, and precise processing requirements.
The first rule is simple:
Never modify a tested canning process merely to make it easier or faster.
Low-acid foods such as plain vegetables, meat, poultry, and seafood require pressure canning. Boiling-water canning is suitable only for foods and recipes approved for that method, generally high-acid or properly acidified foods.
The CDC warns that improperly home-canned foods can cause botulism, a potentially deadly illness.
Use the proper equipment
A stovetop pressure canner is not the same as an ordinary electric pressure cooker.
Do not substitute an Instant Pot-style multicooker for a tested pressure-canning process, even if the appliance has a canning setting.
Before starting any canning project, select a research-tested recipe and check its requirements for the food, jar size, processing method, processing time, and altitude.
Reduce lifting wherever possible
One of the hardest parts of canning is dealing with a large, heavy pot.
A full canner can weigh far more than someone with shoulder or back problems should attempt to lift.
Here are some sensible ways to reduce that strain:
- Position the empty canner securely on the stove before adding its required water.
- Add water in smaller containers rather than carrying a large full pot.
- Keep jars and utensils nearby.
- Use a proper canning jar lifter for hot jars.
- Avoid leaning over the canner when lifting jars.
- Arrange for another capable adult to help with heavy or awkward tasks.
Never try to move a loaded pressure canner to cool it more quickly.
Allow it to depressurize naturally according to the tested instructions and manufacturer guidance. Forced cooling can interfere with safe processing.
Plan seated tasks and standing tasks separately
You can wash and organize supplies, review recipes, label unused storage containers, and perform many preparation tasks while seated.
However, the actual canning process requires close attention.
You must be able to monitor the equipment, maintain the required processing conditions, and handle hot jars safely.
If you cannot do those tasks comfortably or safely, getting help is a better choice than attempting them while exhausted.
5. Choose Smaller Jars When the Recipe Allows
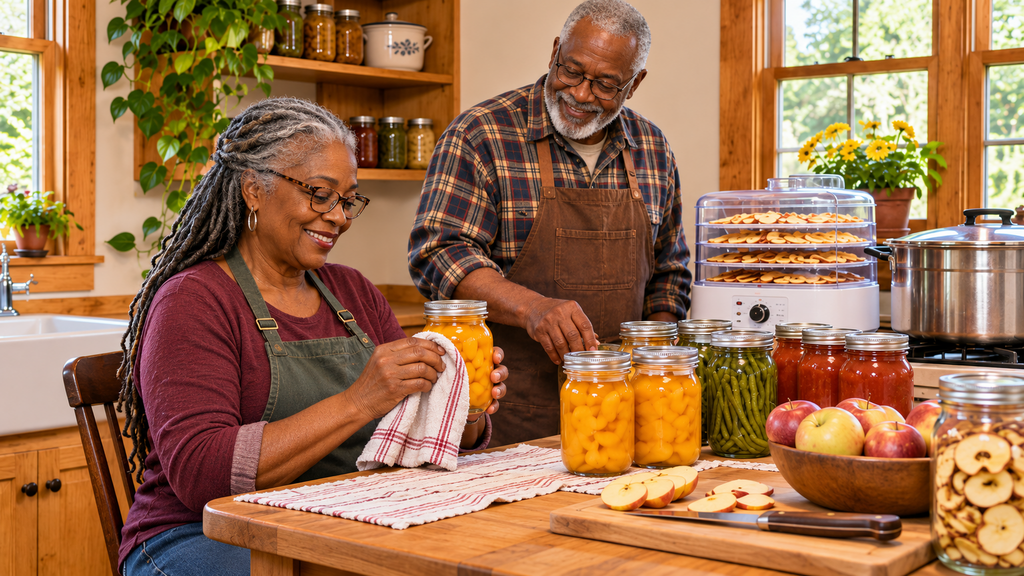
A quart jar filled with food is noticeably heavier than a pint jar.
Using smaller jars can make individual jars easier to manage, particularly for someone who has shoulder problems or limited hand strength.
But here’s the important part.
You cannot freely change jar sizes or processing times.
Use only jar sizes allowed by your tested recipe. Follow its complete instructions. If a smaller jar is not specified, consult an authoritative tested process rather than inventing a shorter time.
Also remember that smaller jars don’t necessarily make an entire canner lighter if you increase the number of jars.
For some people, a few properly processed pint jars are more manageable than a larger canning session.
And if a safe, tested process requires more jars than you can handle, invite a family member or friend to help.
Self-reliance doesn’t mean refusing assistance.
Every small step toward growing, storing, or preserving your own food helps build a more secure and independent future.
Food Sovereignty Means Working within Your Abilities
Being self-reliant doesn’t mean doing everything the hardest way. It means developing practical skills, building reliable food reserves, and finding methods you can continue using as your needs change.
A few jars safely preserved each week, or a small supply of properly dried vegetables, can be far more valuable than one exhausting preservation marathon.
6. Use Tools That Reduce Hand and Shoulder Strain
The right equipment can make a real difference when you’re dealing with arthritis, weak hands, or painful shoulders.
You don’t need a kitchen full of expensive gadgets.
A few thoughtfully chosen tools can eliminate a great deal of repetitive work.
| Tool | How it can help |
| Apple peeler/corer | Reduces repetitive peeling and coring |
| Lightweight food processor | Handles suitable chopping and slicing tasks |
| Nonslip cutting mat | Keeps the work surface from shifting |
| Ergonomic knife | May improve grip comfort |
| Jar lifter | Provides a secure grip on hot canning jars |
| Wide-mouth funnel | Makes filling jars less messy |
| Lightweight dehydrator trays | Easier to load, remove, and clean |
| Rolling utility cart | Moves lightweight supplies without carrying them |
Keep your movements close to your body
Try to avoid reaching across the counter or stretching to lift items from upper shelves.
For anyone who has experienced shoulder surgery, repeated reaching can quickly become uncomfortable.
Store frequently used tools between waist and shoulder height.
Use smaller bowls and containers, even if that means making an extra trip with the rolling cart.
A lightweight object that’s easy to control is usually a better choice than an oversized container that’s difficult to grip.
And never use a hand tool that forces your wrist into a painful or awkward position.
7. Organize Your Kitchen for Fewer Steps
A well-organized preservation station can save a surprising amount of energy.
Think about the path you follow during a typical project.
You wash produce at the sink, carry it to the counter, retrieve a cutting board, find the knives, move everything to another surface, and eventually bring the food to the dehydrator or canner.
That creates unnecessary walking, carrying, bending, and reaching.
Instead, arrange your kitchen into simple work zones.
Washing zone
Keep a colander, produce brush, and lightweight bowls near the sink.
Wash manageable amounts rather than filling one oversized container.
Preparation zone
Use a seated workstation for peeling, slicing, measuring, and organizing ingredients.
Processing zone
Keep the dehydrator or canner in a safe, stable location.
The canner must remain on a suitable heat source. It should never be used from an unstable cart or makeshift surface.
Cooling and storage zone
Prepare a safe landing place for hot jars before you start canning.
After processing, let jars cool undisturbed at room temperature for 12 to 24 hours. Check seals before storing and remove the screw bands from properly sealed jars.
This organized approach helps reduce rushed decisions when you’re already tired.
8. Schedule Breaks without Interrupting Food Safety
Taking breaks is one of the most important parts of working comfortably.
But food preservation isn’t like ordinary housework, where you can simply stop whenever you want.
There are stages when you can pause and stages when you cannot.
Good times to take a break
You can generally pause between separate preparation tasks, after safely refrigerating perishable ingredients, or while waiting for a completely finished batch to cool under its required instructions.
During dehydrating, you may be able to sit nearby and rest while the machine runs, provided you continue the required checks and follow the manufacturer’s directions.
Times when you must not interrupt the process
Do not stop a pressure canning cycle early or turn off the heat just because you need to sit down.
Don’t shorten a boiling-water canning process or allow the required boil to stop.
If processing conditions are interrupted, follow the tested instructions for corrective action. For example, the National Center for Home Food Preservation directs that boiling-water processing time must restart from the beginning if the water stops boiling during processing.
Plan breaks before beginning
If a project requires continuous attention, make sure you’re rested enough to finish safely.
Keep a supportive chair nearby where you can monitor the equipment without getting too close to heat or steam.
If you’re not feeling well enough to concentrate, choose another day.
The produce can often be refrigerated, frozen, or handled by another appropriate preservation method until you’re ready.
9. Don’t Forget the Physical Demands of Cleanup
Food preservation doesn’t end when the jars come out of the canner or the dehydrator stops.
There’s still equipment to wash, counters to clean, and supplies to put away.
This is where many people overdo it.
After several hours of preparation, you’re likely to be tired. Carrying heavy pots to the sink or reaching into deep cabinets can become especially difficult.
Plan for cleanup before you begin.
Wash small tools as you finish using them. Keep a dishpan nearby for items that need soaking.
Let equipment cool safely before handling or cleaning it according to its instructions.
And if necessary, finish nonurgent cleanup later.
There’s no benefit in hurting your back trying to restore the kitchen to perfection immediately.
10. Package and Store Dehydrated Foods Correctly
Dehydrating makes foods lighter and reduces the space they require. But removing moisture isn’t quite as simple as drying food until it looks ready.
Food must reach the correct degree of dryness for safe storage.
Vegetables are generally dried until brittle or crisp. Dried fruits require their own texture checks, and many should be conditioned before final packaging.
Conditioning means loosely packing cooled dried fruit in clean containers for 7 to 10 days, shaking them daily, and watching for condensation. If condensation appears, the fruit needs more drying.
Store properly dried foods in suitable moisture-resistant packaging in a cool, dry, dark location. Check for signs of moisture during storage.
Store food where you can reach it
A beautiful pantry isn’t very useful if you have to climb a ladder to retrieve your supplies.
Put frequently used jars and containers on easy-to-reach shelves.
Avoid stacking heavy jars overhead.
Label containers with the food name and preservation date.
Use older supplies first and periodically inspect your pantry.
If you find mold, leakage, bulging lids, or other signs of spoilage, follow authoritative disposal guidance. Never taste questionable home-canned food to see whether it’s safe.
11. Know When to Choose a Different Preservation Method
Sometimes the smartest choice isn’t canning at all.
For example, if you have a small amount of extra produce and don’t feel well enough to prepare a complete canning batch, freezing may be more practical.
Fresh herbs may be suitable for dehydrating in a small batch.
Some vegetables can be prepared for freezing with the appropriate blanching steps.
The right method depends on the food, the equipment you have, and your ability to complete the work safely.
Here’s a simple comparison.
| Method | Physical demands | Best consideration |
| Dehydrating | Often mostly seated preparation, plus tray handling | Good for manageable batches of suitable foods |
| Boiling-water canning | Hot water, jars, monitoring, lifting | Only for approved recipes and foods |
| Pressure canning | Heavy equipment, heat, continuous process monitoring | Required for low-acid foods |
| Freezing | Preparation, packaging, freezer access | Convenient when reliable electricity is available |
No single method solves every food-storage need.
In fact, a combination of several methods may make the most sense.
12. Build Your Pantry a Little at a Time
One of the biggest mistakes people make with food storage is assuming they must accomplish everything at once.
You don’t need fifty jars of green beans in a weekend.
You don’t need to dehydrate an entire garden harvest in one exhausting session.
What matters is steady progress.
If you dry one manageable batch of apples this week and preserve another appropriate food next week, you’re developing skills and gradually adding useful supplies.
You also learn what your family actually eats.
There’s little value in preserving dozens of jars of something nobody enjoys.
Start with familiar foods. Keep good records. Rotate your supplies.
And give yourself credit for each small improvement.
After all, food sovereignty isn’t a contest to see who can fill the most jars.
It’s about having more control over the food you eat and the resources you depend upon.
13. Plan a Comfortable Food Preservation Day
Here’s an example of how to organize your work without trying to do everything in one session.
A manageable small-batch dehydrating day:
- Set up: Prepare your table, chair, utensils, and clean dehydrator.
- Prepare: Wash and slice a manageable amount of food while seated. Use the appropriate food-specific pretreatment.
- Load: Arrange pieces on the trays, following the dehydrator and preservation instructions.
- Dry: Run the correct drying process, monitoring as required. Rest nearby rather than remaining on your feet.
- Finish: Check dryness, cool the food, and condition fruit when required.
- Store: Package and label only when the food is ready for storage.
This is a workflow, not a drying-time schedule. Actual drying can take many hours and varies by food, thickness, humidity, and equipment.
For canning, use a separate plan based on the exact tested recipe.
Prepare the workspace ahead of time and arrange for help if you’ll need assistance moving supplies or handling heavy equipment.
Never begin a canning process unless you can complete and monitor the required steps.
Why This Matters for Preparedness
For older adults, having food stored at home can provide real peace of mind.
A well-stocked pantry can help during power outages, supply interruptions, severe weather, illness, or periods when getting to the grocery store becomes difficult.
Dehydrating is especially useful because properly dried foods can be lightweight and compact. They can also reduce dependence on freezer space.
Home-canned foods can provide a variety of shelf-stable ingredients and ready-to-use pantry items when prepared and stored correctly.
Both methods can contribute to a more resilient household.
But preparedness must account for your physical abilities.
If maintaining your food reserves requires repeatedly pushing yourself beyond what your body can tolerate, your system needs improvement.
The best preparedness system is one you can use, maintain, and continue building comfortably.
That’s what sustainable food sovereignty means to me.
We grow what we can. We preserve what makes sense. We accept help when it’s needed.
And we keep working toward a little more independence, one manageable project at a time.
Trusted Food Sovereignty Resources
🌿 Trusted Food Sovereignty Sources
Building food independence is easier when you have the right tools and systems. These trusted products can help make growing, storing, preserving, and preparing food more manageable while reducing unnecessary lifting, bending, gripping, and strain.
Whether you’re working with a small garden, building a dependable pantry, preserving a harvest, or adding simple food-production systems at home, these are practical products worth considering.
My Favorite Tools for Easier Food Preservation
Food preservation should help you become more self-reliant, not leave you exhausted or hurting for days.
I’ve put together a collection of useful food-preservation tools that may reduce standing, lifting, gripping, and repetitive kitchen work. Some are simple accessories, while others can make larger jobs much easier to manage.
-
 $89.95Buy Now
Starter Kits Set for Beginners -
Stainless Steel Water Bath Canner Kit & Rack-Rack, XL Ladle, Measuring Cups, Kitchen Funnel
The BEST canning pot and rack in the market that comes with a food-grade stainless steel canning kit + ½ pint (8 oz) canning scoop + 6 measuring cups - steelcore core porcelain lightweight chemical free pot (Assembled in USA, 365 day back warranty, US & UK based 24/7 customer care).
*Customers usually keep this item.
We earn a commission if you make a purchase, at no additional cost to you.
10/31/2026 10:07 pm GMT -
 $109.90Buy Now
400lbs Weight Capacity, Gardening Cart Bench, Ergonomic Backrest & Tool Storage, for Yard, Patio
We earn a commission if you make a purchase, at no additional cost to you.
10/31/2026 10:09 pm GMT -
 $89.99Buy Now
13 in All Terrain Tires, 4-in-1 Yard Wagon Cart with Removable Side Panels for Outdoor Lawn, Yard
I've owned one like this for 22 yrs!
We earn a commission if you make a purchase, at no additional cost to you.
10/29/2026 08:39 pm GMT -
 $59.77Buy Now
Pack of 3 BPA Free Food Storage Containers, Made in USA- 3 Colors (Aqua, Blue, Gray, Black lids)
These 5 Gallon buckets are Food Grade, bucket with lid and can be used as cleaning bucket, water bucket, paint bucket, Fermentation bucket, wash bucket.
These food storage buckets can be used for many foods. Easy open lid can be opened and closed easily.
*Customers usually keep this item.
We earn a commission if you make a purchase, at no additional cost to you.
10/29/2026 09:49 pm GMT -
 $62.99Buy Now
Cucumber Trellis with High-Density Rhombus SteelGrats for Climbing Plants, Tomatoes & Raised Beds, Outdoor Use
Strong enough to support heavy cucumbers, melons, pumpkins, and dense foliage without bending or collapsing. Built to handle several times of ordinary garden trellises.
We earn a commission if you make a purchase, at no additional cost to you.
10/29/2026 09:53 pm GMT -
 $103.17Buy Now
COMPLETE HOME AND GARDEN TOOLKIT - Tackles indoor and outdoor maintenance jobs with a comprehensive 6-piece set featuring ergonomically designed PowerGear Lopper, 9-in-1 Shears, Bypass Pruner, Folding Saw, IsoCore Hammer, and Utility Knife
We earn a commission if you make a purchase, at no additional cost to you.
10/29/2026 09:58 pm GMT -
 $79.99Buy Now
Equipped with easy-lock handle, built-in cutter, sealed hose, 1 roll + 15 vacuum bags for food preservation Black Silver
95kPa Powerful Suction - 50% faster than standard sealers
With a 230W high-power motor and high-quality heating wire, the QKWXV vacuum sealer achieves a tight vacuum seal in 8–18 seconds under 95kPa suction force—50% faster than standard sealers. Its upgraded silicone sealing ring prevents leaks, enhances vacuum performance, and extends machine durability after rigorous 3,000+ cycle testing.
We earn a commission if you make a purchase, at no additional cost to you.
10/29/2026 09:59 pm GMT -
 $49.99Buy Now
350W | Expandable to 7 Trays, 48H Timer, for Jerky, Fruit, Herbs, Meat, Veggies and Dog Treats, 50-Recipes Book Included, White
Love this! Great price 🙂
We earn a commission if you make a purchase, at no additional cost to you.
10/29/2026 09:20 pm GMT -
 $68.99Buy Now
Premium Corn-Grinding Mill and Grain Grinder, Made in Colombia
MANUAL MILLING MACHINE: This grain mill has a durable cast-iron hand crank with a wooden handle and high-performance white iron discs for grinding all types of grain. Simply adjust the screw to change the coarseness and fineness of your milling.
VERSATILE GRINDER: Use this grain grinder for home brewing, corn, barley, grains, coffee, cheese, vegetables, seeds, nuts, coconut, spices, dried beans, cooked meats, and more. Please note that this grinder cannot grind to a superfine texture and will not grind whole wheat into a fine powder.
Looks like the meat grinder my grandmother left me!
We earn a commission if you make a purchase, at no additional cost to you.
10/29/2026 09:36 pm GMT -
 $99.95Buy Now
15" Tall Large Plant Pots with Trellis for Flowers Plants Decor, Cream White
Innovative Watering System in Raised Garden Planter: A reliable and efficient solution for delivering water to your plants without having to worry about overflow.
The water storage volume of the tomato planter box is about 9L, fill it once to water your planter for up to 1.5 months! This innovative design gives new gardeners a hassle-free way to start growing!
We earn a commission if you make a purchase, at no additional cost to you.
10/29/2026 09:45 pm GMT

🌱 Continue the Food & Water Sovereignty Series
Every household’s food and water security plan looks a little different. These related articles can help you build yours one practical piece at a time.
As I complete these associated posts, the link will be underlined.
Popular Guides
🌱 10 Low-Lift Root Cellar Tips for Seniors with Bad Backs and Shoulders.
🌼 Off-Grid Water Filtration for Joint Health
🧰 Building a 90-Day Pantry on a Fixed Income
🪶 Dehydrating and Canning When Standing Too Long Hurts
🛒 Seed Saving Basics for a Self-Sufficient Pantry
🥕 Bartering and Local Food Networks for Seniors Who Prep Alone
🗺️ Your Local Food Backup Plan: Who Will Still Have Food after a Disaster?
📋 A Caregiver’s Emergency Food and Information Plan for an Older Adult
👉 See Every Food Sovereignty Article
Discover practical food sovereignty tips that make growing, storing, preserving, and preparing food easier, safer, and more manageable for older adults.
FAQs
Can seniors dehydrate food while sitting down?
Yes. Most of the washing, peeling, slicing, and arranging of food can be done while sitting at a sturdy worktable. Place the dehydrator where you can safely load and remove its trays without excessive reaching.
Is dehydrating easier than canning for someone with back pain?
Often, yes. Dehydrating generally involves less heavy equipment and boiling water. However, some foods require blanching, and trays still need to be handled. Choose the method that matches your abilities.
Can I use smaller canning jars to make lifting easier?
Yes, when smaller jars are allowed by the tested recipe. Follow the specified processing instructions. Don’t invent shorter processing times or change jar sizes without verified guidance.
Can I take breaks while pressure canning?
You can rest while safely monitoring the equipment, but you cannot interrupt the required pressure-canning process to take a break. The correct pressure and processing time must be maintained. Plan ahead and arrange for help if necessary.
Can I use my Instant Pot instead of a pressure canner?
No. Household electric pressure multicookers aren’t recommended for USDA pressure-canning processes. Use an appropriate pressure canner and a research-tested recipe.
How should seniors store home-preserved foods?
Store properly sealed canned goods and correctly dried foods in a cool, dry, dark place. Label them clearly, rotate supplies, and keep frequently used containers on shelves that are easy to reach without climbing or heavy lifting.
Comments
Do You Preserve Your Own Food?
Have you found a way to make canning or dehydrating easier on your back, knees, or hands?
Maybe you’ve discovered a useful kitchen tool, changed how you organize your workspace, or learned to tackle smaller batches instead of spending an entire day preserving food.
I’d love to hear what works for you. Share your favorite food-preservation tip in the comment section below. Your experience might help another senior stay independent and keep enjoying the satisfaction of putting food by.