
Building a 90-Day Pantry on a Fixed Income: A Practical Guide for Seniors

Introduction
If you’re living on Social Security, a pension, or another fixed income, the idea of storing three months of food might seem impossible. Grocery prices are already stretching our budgets, and buying extra food can feel like a luxury.
But building a 90-day pantry doesn’t mean buying everything at once. It means making small, thoughtful purchases over time, choosing foods you’ll actually eat, and gradually creating a dependable cushion against emergencies, shortages, and rising prices.
You don’t need a basement full of supplies or a fancy storage system. A few shelves, a sensible shopping plan, and a little patience can take you a long way.
🌿 From My Homestead
Living on five rural acres has taught me that food security usually comes from small systems working together: growing some food, keeping a dependable pantry, preserving what you can, and planning ahead.
As I’ve gotten older, I’ve also learned to make self-reliance easier on the body. My goal with this series is to help you build more control over your food supply in practical ways that fit your space, budget, energy, and abilities.
The tips I share come from real experience, along with research and current homesteading best practices. My goal is simple: help you keep homesteading safely, comfortably, and for many years to come.
A well-stocked pantry isn’t about how much you can afford to buy today. It’s about making sure tomorrow’s meals are a little more secure than yesterday’s.
TL;DR for Seniors: Building a 90-Day Pantry on a Fixed Income
You can build a practical three-month food supply without putting your monthly budget under more pressure. Start with familiar foods, work toward short-term goals, and add affordable staples as your finances allow.
🌿 Key Points:
✅ Begin with a three-day supply, then work toward 14, 30, 60, and 90 days.
✅ Buy inexpensive foods you already eat.
✅ Set a realistic weekly or monthly pantry budget.
✅ Include protein, vegetables, fruit, grains, and easy-to-prepare meals.
✅ Store food where it’s accessible, dry, and protected from heat.
✅ Rotate supplies regularly to avoid waste.
✅ Keep emergency water and no-cook meals as part of your plan.
🌻 Takeaway: You don’t need to build a 90-day pantry overnight. Small, steady steps can create meaningful food security without risking your financial stability.
Why a 90-Day Pantry Makes Sense for Seniors
Most emergency preparedness advice focuses on having several days of food available. That’s an important starting point, but it doesn’t address every problem seniors may face.
Consider what happens when a major storm closes grocery stores, an unexpected medical bill reduces your food budget, or a temporary disruption makes certain foods difficult to find.
You may not need your emergency pantry for a full 90 days. But having extra food gives you options.
A three-month pantry can help you:
- Reduce unnecessary trips to the grocery store.
- Avoid panic buying before severe weather.
- Stretch your food budget during expensive months.
- Maintain familiar meals during temporary disruptions.
- Support your independence when transportation is difficult.
- Reduce dependence on an uninterrupted grocery supply.
It can also help protect your peace of mind.
Knowing that you have enough food to prepare your usual meals for several weeks is reassuring.
Remember: A 90-day pantry is a personal preparedness goal, not an official requirement. Federal emergency guidance generally starts with several days of food and water. Build additional reserves only as your finances, space, and needs allow.
Step 1: Start with the Food You Already Own
Before spending another dollar, take a look around your kitchen.
Check your pantry shelves, cabinets, freezer, and any additional storage areas.
You may be surprised by how much food you already have.
Write down your existing supplies and group them into simple categories:
- Proteins: Canned tuna, salmon, chicken, beans, peanut butter, and lentils.
- Grains: Rice, pasta, oats, cereal, crackers, and flour.
- Vegetables: Canned tomatoes, green beans, peas, carrots, and corn.
- Fruits: Canned peaches, applesauce, raisins, and other dried fruits.
- Meal ingredients: Soups, broth, sauces, oils, seasonings, and shelf-stable milk.
Don’t count food that has spoiled or that you cannot safely use.
Next, look at the meals you already make.
If you enjoy chicken and rice, vegetable soup, pasta, or bean dishes, those are excellent places to begin.
Your pantry should support your normal eating habits, not force you to learn an entirely new way of cooking during an emergency.
A Simple Pantry Inventory
| Food | On Hand | Goal | Need to Buy |
| Canned beans | 4 cans | 12 cans | 8 cans |
| Rice | 2 lb | 6 lb | 4 lb |
| Canned vegetables | 6 cans | 18 cans | 12 cans |
| Oatmeal | 1 container | 3 containers | 2 containers |
| Canned tuna | 3 cans | 9 cans | 6 cans |
These quantities are illustrative, not a complete 90-day supply. Adjust them to your household, appetite, and dietary needs.
Don’t worry if your inventory looks small.
You’re establishing a starting point, not grading yourself on what you haven’t purchased.
Step 2: Build Your Pantry in Manageable Stages
Trying to purchase 90 days of groceries all at once can quickly become overwhelming.
Instead, break your goal into five stages.
Stage 1: Three Days
Begin with enough familiar, shelf-stable food for three days.
Choose meals that require little or no cooking and very little water.
This becomes your immediate emergency food supply.
Stage 2: Two Weeks
Expand your basic supplies to cover 14 days.
Focus on reliable ingredients that work in several meals, such as beans, rice, pasta, canned vegetables, and canned protein.
Stage 3: One Month
Build enough food for approximately 30 days.
Add variety so that you’re not eating the same foods every day.
Include fruits, protein sources, and foods appropriate for your medical or dietary needs.
Stage 4: Two Months
Continue adding pantry staples as money becomes available.
Replace foods you use and watch for genuine savings.
There’s no reason to rush.
Stage 5: Three Months
Once you’ve reached 90 days, shift your attention from accumulating food to maintaining your supply.
Use older items first and replace them through your regular grocery shopping.
A 90-day pantry works best when it’s part of your normal kitchen routine.
Step 3: Set a Pantry Budget You Can Actually Afford
Here’s where I think seniors need especially practical advice.
Many preparedness articles suggest buying large quantities of food without discussing how people are supposed to pay for it.
That’s not very helpful when every dollar already has a job.
The better approach is to choose an amount that won’t interfere with essential expenses such as groceries, utilities, medication, housing, or transportation.
You might start by setting aside $5, $10, or $15 per week, depending on what you can comfortably afford.
What Small Weekly Amounts Can Add Up To
| Weekly Amount | 13 Weeks | 26 Weeks | 52 Weeks |
| $5 | $65 | $130 | $260 |
| $10 | $130 | $260 | $520 |
| $15 | $195 | $390 | $780 |
These amounts aren’t estimates of what a 90-day pantry costs. They simply illustrate how modest contributions accumulate.
The actual cost depends on your location, household size, food preferences, existing supplies, and nutritional needs.
A good rule: Never go into debt or skip essential expenses to build an emergency pantry.
If your budget is especially tight, make your first goal one additional day of food. Then add another.
Progress matters more than speed.
Step 4: Choose Affordable Foods That Work in Several Meals
The most useful pantry foods aren’t necessarily the products sold in expensive emergency food buckets.
Ordinary grocery staples often provide better flexibility.
Beans and Lentils
Beans are inexpensive sources of protein and fiber.
Canned beans are especially useful when you cannot cook. Dried beans often cost less per serving but require water, cooking time, and fuel.
Lentils generally cook faster than many dried beans, making them convenient for everyday meals. (I’ll eat lentils, especially lentil soup, but they are not my favorite).
Rice, Pasta, and Oatmeal
These familiar foods can form the foundation of many inexpensive meals.
Rice works with beans, vegetables, and canned meats.
Pasta can be combined with canned tomatoes, vegetables, and sauces.
Oatmeal provides an inexpensive breakfast and can be combined with shelf-stable milk or dried fruit.
Canned Vegetables and Fruit
Canned produce can be especially useful when fresh food is unavailable.
Choose vegetables without added salt and fruit packed in water or juice when practical.
Buying familiar varieties improves the chances that everything will be used.
Canned Fish, Chicken, and Other Proteins
Canned proteins make it easier to create satisfying meals without depending entirely on a refrigerator or freezer.
Smaller cans or pouches can reduce leftovers when refrigeration is unavailable.
Choose varieties you enjoy and can safely open.
Peanut Butter and Other Spreads
Peanut butter is a convenient shelf-stable food that provides calories, protein, and fat.
It can work with crackers, bread, oats, and snacks.
Check labels for dietary restrictions and choose suitable alternatives if allergies are a concern.
Soups and Ready-to-Eat Meals
These are worth keeping for days when you’re tired, unwell, or unable to cook.
A pantry filled entirely with dry beans and rice won’t be very helpful if you lose electricity and have no alternative cooking method.
My suggestion: Keep a mixture of inexpensive ingredients and ready-to-eat foods. That gives you more flexibility.
Step 5: Plan Meals before You Count Your Pantry Complete
Ninety days of food means more than having 90 cans sitting on a shelf.
You need enough food to prepare satisfying meals that meet your household’s needs.
Start by writing down seven inexpensive meals you already enjoy.
For example:
| Meal | Pantry Ingredients |
| Oatmeal with fruit | Oats, dried fruit, shelf-stable milk |
| Tuna and crackers | Canned tuna, crackers |
| Pasta with tomato sauce | Pasta, canned tomatoes, seasonings |
| Bean and vegetable soup | Canned beans, vegetables, broth |
| Chicken and rice | Canned chicken, rice, seasonings |
| Lentil soup | Lentils, vegetables, broth |
| Peanut butter snack | Peanut butter, crackers, dried fruit |
These are meal ideas, not a complete balanced menu. Add suitable vegetables, fruit, protein, and other foods to meet your needs.
Now calculate how many times you would realistically prepare each meal in a month.
Multiply those quantities by three to develop a personalized 90-day shopping target.
Keep a separate portion of your supplies for meals that don’t require cooking or refrigeration.
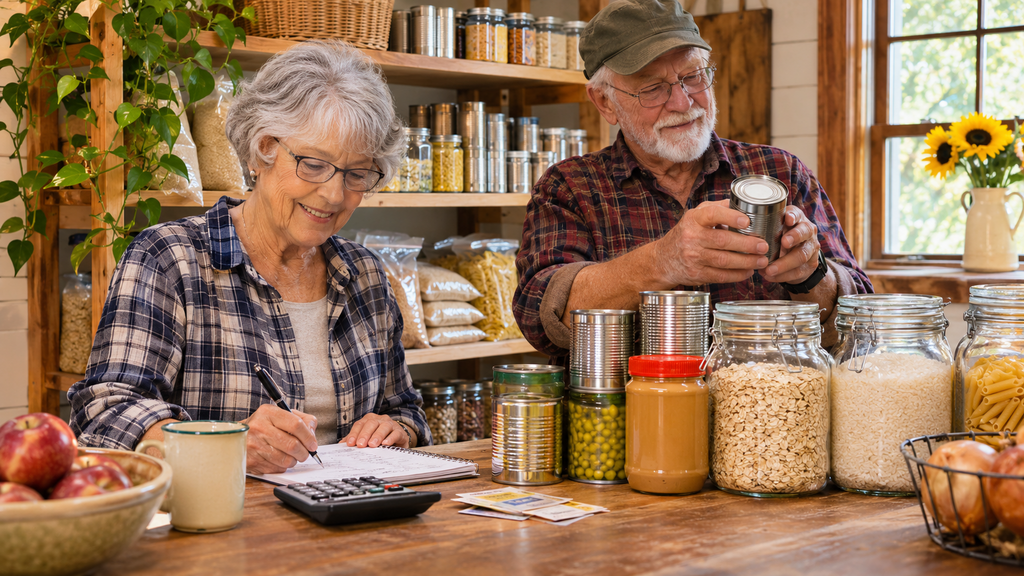
If you follow a special diet, have swallowing difficulties, or must manage sodium, potassium, carbohydrates, or other nutrients, plan your pantry around those needs rather than choosing foods solely because they’re inexpensive.
Step 6: Shop Smarter instead of Simply Buying More
A bargain isn’t much of a bargain if the food ends up in the trash.
Before purchasing a sale item, ask yourself whether you actually use it.
Here are several ways to make your pantry budget work harder.
Compare Unit Prices
A large package isn’t always cheaper.
Compare the cost per ounce, pound, or serving.
Shop Your Own Pantry First
Check what you already have before making a shopping list.
This prevents unnecessary duplicates.
Take Advantage of Store Brands
Many store-brand canned goods, grains, and other staples cost less than nationally advertised brands.
Compare ingredients and nutrition labels rather than assuming a higher price means better food.
Watch for Seasonal Sales
Holiday promotions and store specials can be useful opportunities to stock up.
But don’t buy more than you can safely store and use.
Consider Food Assistance Programs
If you’re eligible, programs such as SNAP, local food pantries, senior food distribution services, and community meal programs may help protect your regular food budget.
There’s no reason to overlook resources designed to help people maintain access to nutritious food.
Keep a Running Shopping List
Instead of purchasing whatever catches your eye, maintain a short list of the foods needed to reach your next pantry goal.
This makes shopping quicker and helps you stay within budget.
Every small step toward growing, storing, or preserving your own food helps build a more secure and independent future.
Step 7: Make Your Pantry Easier on Your Back, Knees, and Shoulders
A well-stocked pantry shouldn’t create another physical problem.
Heavy containers, low shelves, and poorly organized cabinets can make even simple food preparation uncomfortable.
Fortunately, a few adjustments can help.
Keep Frequently Used Foods between Waist and Shoulder Height
Avoid placing heavy supplies on the floor or high overhead.
Store everyday items where you can reach them comfortably without excessive bending or stretching.
Use Smaller Containers
A giant bag of rice may offer a lower unit price, but it isn’t a bargain if you cannot move it safely.
Ask for help dividing bulk purchases into smaller food-safe containers.
Choose Easy-Open Packaging
Consider pull-tab cans, smaller jars, and lightweight packages.
Keep an easy-to-use manual can opener available in case the electricity goes out.
Label Everything Clearly
Large-print labels can make your pantry much easier to manage.
Write the purchase month and year on packages when appropriate.
Avoid Overloading Shelves
Food gets heavy quickly.
Use sturdy shelving, keep heavier containers lower, and avoid stacking supplies where they could fall.
A simple, accessible pantry is more useful than a beautifully arranged one you can barely reach.
Step 8: Store Food Properly to Prevent Waste
Food storage conditions matter.
According to USDA food safety guidance, commercially canned foods should be kept in a cool, clean, dry location, away from excessive heat and moisture.
High-acid canned foods, such as tomatoes and fruit, generally maintain their best quality for about 12 to 18 months. Many low-acid canned foods, such as vegetables and meat, maintain quality for roughly two to five years under proper storage conditions.
These are general quality guidelines, not guarantees that every product is safe for a specific period.
Always inspect packaging and follow applicable storage instructions.
Avoid using food from leaking, bulging, badly dented, or rust-damaged cans.
Never taste suspicious food to determine whether it’s safe.
Don’t store your emergency pantry in a hot garage, damp shed, or anywhere exposed to major temperature changes.
In warm climates, an interior air-conditioned closet may be much safer for food than an outdoor storage area.
Practice First In, First Out
The simplest pantry rotation method is often called FIFO.
That means:
First In, First Out.
When you buy replacement food, move older packages toward the front and newer ones toward the back.
Use the oldest suitable products first.
This keeps your pantry fresh and reduces waste.
Step 9: Don’t Forget Water and Cooking Fuel
Food is only part of the preparedness equation.
Rice, pasta, and dried beans are useful, but they require water and some form of cooking.
What happens if both your water supply and electricity are unavailable?
Start with the emergency water recommendations from the CDC.
Store at least one gallon per person per day for a minimum of three days. Work toward a two-week supply if possible.
More may be needed in hot climates, for certain health needs, and for pets.
For one person, the basic three-day minimum is three gallons. A 14-day supply is 14 gallons.
You don’t need to lift large containers yourself. Smaller bottles or manageable containers may be more practical.
Your 90-day food plan should also include:
- Ready-to-eat meals for short-term emergencies.
- A safe alternative cooking option, if appropriate.
- Foods that require little water.
- A manual can opener.
- A realistic plan for obtaining additional safe water during extended disruptions.
Never use outdoor grills, camp stoves, or fuel-burning equipment indoors unless the manufacturer specifically approves that use. Carbon monoxide can be deadly.
A 90-day food pantry does not automatically mean you need 90 days of stored drinking water. Food and water preparedness require separate plans.
Step 10: Maintain Your Pantry without Increasing Your Grocery Bill
Once you’ve built a comfortable reserve, the next challenge is keeping it stocked.
The good news is that maintaining a pantry is usually easier than building one from scratch.
Use your stored food in everyday meals.
When you open a can of beans, add beans to your next shopping list.
When you use a package of pasta, replace it when your budget permits.
This approach gradually turns your pantry into a rotating supply of familiar foods.
Set aside a few minutes each month to check:
- Food quantities.
- Damaged packaging.
- Best-by dates and storage conditions.
- Foods that need replacing.
- Changes in your household or dietary needs.
You don’t have to reorganize every shelf.
A short monthly check is enough to keep most simple pantry systems on track.
A Sample 90-Day Pantry Building Schedule
Here is a realistic approach for someone working with a limited budget.
| Period | Goal | Main Focus |
| Month 1 | Three-day reserve | No-cook meals and emergency water |
| Month 2 | Seven-day reserve | Canned proteins, vegetables, and fruit |
| Month 3 | Fourteen-day reserve | Rice, pasta, oats, beans, and meal planning |
| Months 4–6 | Work toward 30 days | Variety, rotation, and accessible storage |
| Months 7–9 | Work toward 60 days | Fill gaps and expand meal ingredients |
| Months 10–12 and beyond | Work toward 90 days | Complete meal coverage and maintain supplies |
This is a sample schedule, not a deadline.
A 90-day pantry may take six months, a year, or longer to build.
What matters is that each purchase makes sense for your budget.
Common Pantry Mistakes That Waste Money
I’ve seen enough preparedness advice to know that it’s easy to get carried away with supplies.
Here are several mistakes worth avoiding.
Buying foods you don’t enjoy. Emergency supplies should consist largely of foods you’ll actually eat.
Purchasing huge quantities before testing them. Try a small amount first.
Ignoring cooking requirements. Dried foods may require more water and fuel than you expect.
Forgetting nutrition. A pantry filled with crackers and noodles won’t provide the variety needed for long-term meals.
Storing everything in one place. Consider the risk of leaks, pests, heat, or flooding.
Buying heavy containers you cannot manage. Choose packaging and storage methods that work with your physical abilities.
Failing to rotate supplies. Food that’s forgotten often becomes wasted money.
Trying to finish too quickly. Preparedness should improve financial stability, not undermine it.
Why This Matters for Preparedness
Food sovereignty isn’t simply about growing vegetables or filling shelves.
It’s about having more control over something essential to everyday life.
For seniors, that control becomes particularly valuable when transportation is limited, storms interrupt local services, or rising grocery prices make household budgeting difficult.
A 90-day pantry offers a practical way to become less dependent on constant shopping.
It also complements other preparedness skills, such as growing small amounts of food, preserving harvests, saving seeds, and storing emergency water.
You may never need to rely entirely on your pantry for three months.
But the supplies are still useful because they’re part of your regular meals.
That’s what makes this approach sustainable.
Your pantry doesn’t have to be impressive. It has to be useful, affordable, accessible, and filled with food you know how to prepare. Start small, rotate regularly, and let your reserves grow at a pace your budget allows.
Trusted Food Sovereignty Resources
🌿 Trusted Food Sovereignty Sources
Building food independence is easier when you have the right tools and systems. These trusted products can help make growing, storing, preserving, and preparing food more manageable while reducing unnecessary lifting, bending, gripping, and strain.
Whether you’re working with a small garden, building a dependable pantry, preserving a harvest, or adding simple food-production systems at home, these are practical products worth considering.
Recommended authoritative resources:
- USDA Food Safety and Inspection Service: Shelf-stable food safety and canned food storage.
- USDA MyPlate: Budget-friendly meals and nutrition planning.
- CDC: Creating and storing an emergency water supply.
- Ready.gov: Building an emergency supply kit.
- USDA Food and Nutrition Service: SNAP and other nutrition assistance programs.
My Favorite Tools for an Easier, More Organized Pantry
Building a practical food supply shouldn’t require heavy lifting or complicated storage systems. I’ve put together a collection of pantry organization tools, lightweight food containers, useful can openers, and other supplies that can make food storage easier for seniors.
Some tools may help reduce bending, gripping, reaching, and carrying.
-
 $89.95Buy Now
Starter Kits Set for Beginners -
Stainless Steel Water Bath Canner Kit & Rack-Rack, XL Ladle, Measuring Cups, Kitchen Funnel
The BEST canning pot and rack in the market that comes with a food-grade stainless steel canning kit + ½ pint (8 oz) canning scoop + 6 measuring cups - steelcore core porcelain lightweight chemical free pot (Assembled in USA, 365 day back warranty, US & UK based 24/7 customer care).
*Customers usually keep this item.
We earn a commission if you make a purchase, at no additional cost to you.
10/31/2026 10:07 pm GMT -
 $109.90Buy Now
400lbs Weight Capacity, Gardening Cart Bench, Ergonomic Backrest & Tool Storage, for Yard, Patio
We earn a commission if you make a purchase, at no additional cost to you.
10/31/2026 10:09 pm GMT -
 $89.99Buy Now
13 in All Terrain Tires, 4-in-1 Yard Wagon Cart with Removable Side Panels for Outdoor Lawn, Yard
I've owned one like this for 22 yrs!
We earn a commission if you make a purchase, at no additional cost to you.
10/29/2026 08:39 pm GMT -
 $59.77Buy Now
Pack of 3 BPA Free Food Storage Containers, Made in USA- 3 Colors (Aqua, Blue, Gray, Black lids)
These 5 Gallon buckets are Food Grade, bucket with lid and can be used as cleaning bucket, water bucket, paint bucket, Fermentation bucket, wash bucket.
These food storage buckets can be used for many foods. Easy open lid can be opened and closed easily.
*Customers usually keep this item.
We earn a commission if you make a purchase, at no additional cost to you.
10/29/2026 09:49 pm GMT -
 $62.99Buy Now
Cucumber Trellis with High-Density Rhombus SteelGrats for Climbing Plants, Tomatoes & Raised Beds, Outdoor Use
Strong enough to support heavy cucumbers, melons, pumpkins, and dense foliage without bending or collapsing. Built to handle several times of ordinary garden trellises.
We earn a commission if you make a purchase, at no additional cost to you.
10/29/2026 09:53 pm GMT -
 $103.17Buy Now
COMPLETE HOME AND GARDEN TOOLKIT - Tackles indoor and outdoor maintenance jobs with a comprehensive 6-piece set featuring ergonomically designed PowerGear Lopper, 9-in-1 Shears, Bypass Pruner, Folding Saw, IsoCore Hammer, and Utility Knife
We earn a commission if you make a purchase, at no additional cost to you.
10/29/2026 09:58 pm GMT -
 $79.99Buy Now
Equipped with easy-lock handle, built-in cutter, sealed hose, 1 roll + 15 vacuum bags for food preservation Black Silver
95kPa Powerful Suction - 50% faster than standard sealers
With a 230W high-power motor and high-quality heating wire, the QKWXV vacuum sealer achieves a tight vacuum seal in 8–18 seconds under 95kPa suction force—50% faster than standard sealers. Its upgraded silicone sealing ring prevents leaks, enhances vacuum performance, and extends machine durability after rigorous 3,000+ cycle testing.
We earn a commission if you make a purchase, at no additional cost to you.
10/29/2026 09:59 pm GMT -
 $49.99Buy Now
350W | Expandable to 7 Trays, 48H Timer, for Jerky, Fruit, Herbs, Meat, Veggies and Dog Treats, 50-Recipes Book Included, White
Love this! Great price 🙂
We earn a commission if you make a purchase, at no additional cost to you.
10/29/2026 09:20 pm GMT -
 $68.99Buy Now
Premium Corn-Grinding Mill and Grain Grinder, Made in Colombia
MANUAL MILLING MACHINE: This grain mill has a durable cast-iron hand crank with a wooden handle and high-performance white iron discs for grinding all types of grain. Simply adjust the screw to change the coarseness and fineness of your milling.
VERSATILE GRINDER: Use this grain grinder for home brewing, corn, barley, grains, coffee, cheese, vegetables, seeds, nuts, coconut, spices, dried beans, cooked meats, and more. Please note that this grinder cannot grind to a superfine texture and will not grind whole wheat into a fine powder.
Looks like the meat grinder my grandmother left me!
We earn a commission if you make a purchase, at no additional cost to you.
10/29/2026 09:36 pm GMT -
 $99.95Buy Now
15" Tall Large Plant Pots with Trellis for Flowers Plants Decor, Cream White
Innovative Watering System in Raised Garden Planter: A reliable and efficient solution for delivering water to your plants without having to worry about overflow.
The water storage volume of the tomato planter box is about 9L, fill it once to water your planter for up to 1.5 months! This innovative design gives new gardeners a hassle-free way to start growing!
We earn a commission if you make a purchase, at no additional cost to you.
10/29/2026 09:45 pm GMT

Building Your Own System, One Piece at a Time
You don’t need to do everything this week.
Start with one shelf.
Choose a few dependable foods.
Build a week’s worth of meals.
Then keep going.
As your pantry grows, you’ll gain a better understanding of how much food you really use, which ingredients give you the most flexibility, and what works best for your household.
Grow More. Store More. Depend Less.
That’s the heart of food sovereignty, and it doesn’t have to cost a fortune.
🌱 Continue the Food & Water Sovereignty Series
Every household’s food and water security plan looks a little different. These related articles can help you build yours one practical piece at a time.
As I complete these associated posts, the link will be underlined.
Popular Guides
🌱 10 Low-Lift Root Cellar Tips for Seniors with Bad Backs and Shoulders.
🌼 Off-Grid Water Filtration for Joint Health
🧰 Building a 90-Day Pantry on a Fixed Income
🪶 Dehydrating and Canning When Standing Too Long Hurts
🛒 Seed Saving Basics for a Self-Sufficient Pantry
🥕 Bartering and Local Food Networks for Seniors Who Prep Alone
🗺️ Your Local Food Backup Plan: Who Will Still Have Food after a Disaster?
📋 A Caregiver’s Emergency Food and Information Plan for an Older Adult
👉 See Every Food Sovereignty Article
Discover practical food sovereignty tips that make growing, storing, preserving, and preparing food easier, safer, and more manageable for older adults.
FAQs
Can I really build a 90-day pantry on Social Security?
Yes, although the time required depends on your income and essential expenses. Begin with food already on hand and gradually purchase extra staples when your budget allows. There’s no requirement to complete your pantry within 90 days.
How much does a 90-day food supply cost for one person?
There isn’t one reliable price. Costs vary considerably based on location, diet, portion sizes, existing supplies, and food choices. Planning meals and tracking quantities gives you a more accurate estimate than purchasing a generic emergency food package.
What are the cheapest foods to stockpile?
Dry beans, lentils, rice, oats, and pasta are often inexpensive staples. Canned beans, vegetables, and fish can also be practical choices. Compare unit prices and remember to account for cooking fuel and water.
How much food should I store before an emergency?
Start with enough shelf-stable food for at least three days. Build toward two weeks, one month, and eventually 90 days if your circumstances allow. Include foods that can be eaten without cooking.
Where should seniors store extra food in a small home?
Use an interior closet, sturdy pantry shelves, or another cool, dry area. Keep frequently used supplies at comfortable reaching heights and avoid placing heavy containers overhead or on the floor.
How do I keep pantry food from expiring?
Use foods regularly, replace what you consume, and keep older products toward the front. Inspect packaging and follow appropriate food safety and storage guidance.
Should I buy freeze-dried emergency food?
It can be convenient, but it isn’t necessary for building a dependable pantry. Familiar grocery staples may be more affordable and easier to rotate into everyday meals. Remember that many freeze-dried meals require safe water.
I’d Love to Hear from You
Are you working toward a three-month pantry, or have you already started building one?
What’s your favorite inexpensive food to keep stocked?
And have you discovered any clever ways to stretch your grocery budget while preparing for emergencies?
Share your experience in the comment section below. Your ideas may help another senior build a more dependable pantry without spending more than they can afford.